It’s no secret that Flippity is one of my favorite teacher tools…it’s free and completely customizable! If Flippity Steve ever took Flippity away from us, I’d burst into tears and then seriously consider quitting. I use Flippity THAT MUCH! There’s a another Flippity tool I’ve been incorporating lately that deserves its own post.
So, you might not think there’s anything life shattering about online flash cards, but Flippity’s Flashcards are anything but ordinary! In the past, I used to keep a Quizlet set of flashcards for each class. Students who wanted extra “practice” or parents who wanted their students to “study” could run through them at home, and it was helpful for absent students to access the vocabulary while out of class. That worked fine for years, but something happened over at Quizlet, and now kids need to create an account (and possibly subscribe?!?!) to access my Quizlet sets. (I am getting mixed reports from my Little Darlings, but the point is: Quizlet is not working for us any more and I was on the hunt for a vocab practice from home replacement. Enter Flippity)
Flippity’s Flash Cards are not new, (I think it’s actually the OG Flippity tool!) but they are new to me, and I’m here to give them some love, because I’m so impressed! Like all of Flippity’s Awesomeness, they’re built using Google Sheets, which means you keep the spreadsheet in your Google Drive and it’s easy as pie to make changes…and even better, there are no advertisements for students to see! Let’s dive in:
First head on over to Flippity.net, look for “Flippity Flashcards”. Click on instructions, then click on the highlighted “make a copy of this template”, which will force a copy of a Google Sheet into your Google Drive.
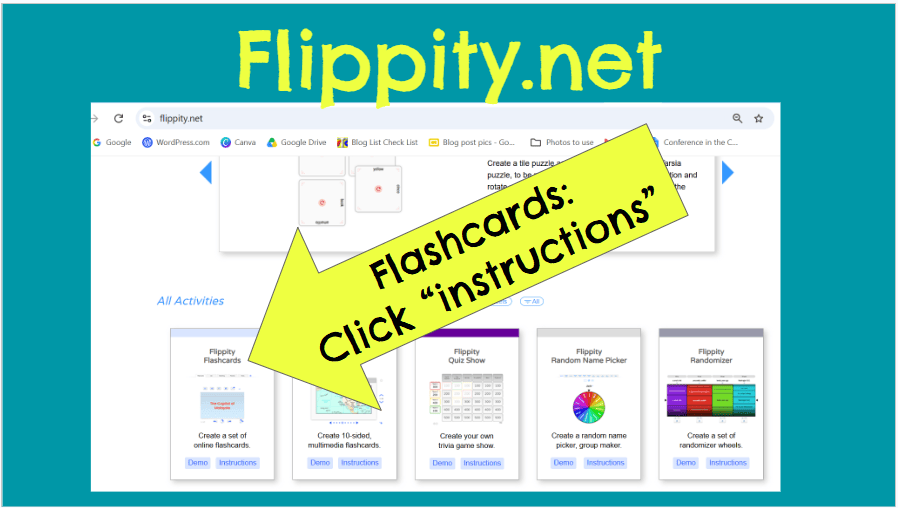
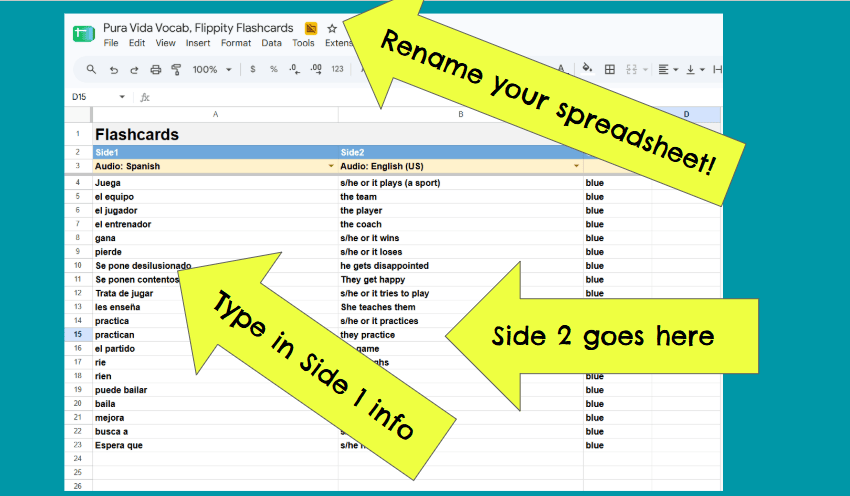
Once you’ve got your Spreadsheet open, you’re on your way! It will come pre-populated with random info for generic flashcards, just delete and make it your own. Add in the content you want on Side 1 (Column A) and Side 2 (Column B). You can even add images and YouTube videos to the cards! (Scroll down for instructions for both!) Adjust the language at the top, so that students can hear the flashcards and pick a color for your cards. You could make a beautiful multicolored deck, but I recommend you make the cards all the same color….I’ll show you why in a second.
And for the love of everything holy, rename your spreadsheet and move it into a folder that makes sense, if you ever want to see it again, because if your Google Drive is anything like my Google Drive, the depths of despair are deep!
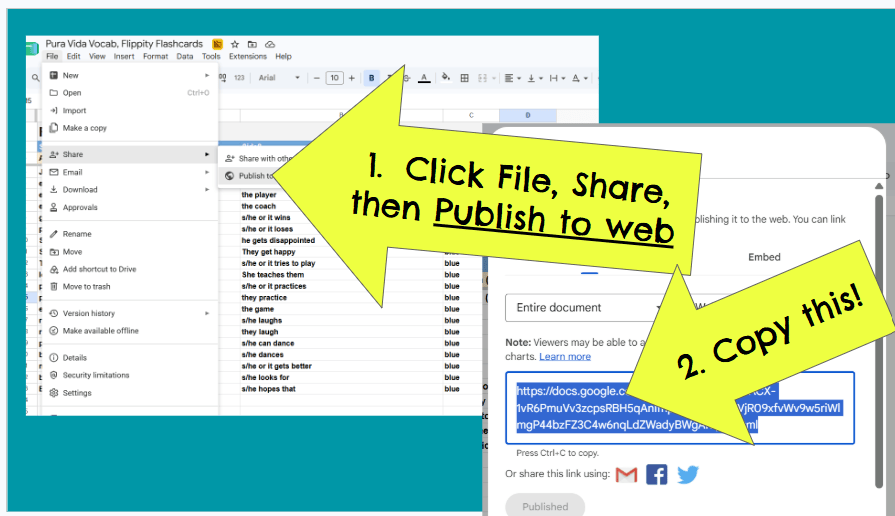
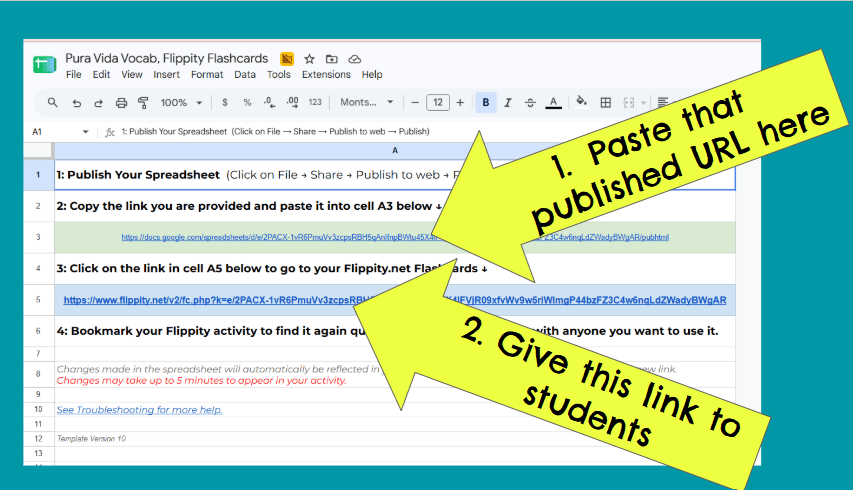
Then, like all Flippity Spreadsheets, you must publish it to the web. Click “File”, then “Share”, then “Publish to the web”. It will give you a long and messy URL. Copy it and you’re just moments away from flashcards.
Then a the very bottom of the spreadsheet, you’ll see a page that says “Get the link here”. Open that page and you’ll paste the link you just copied into Cell 3A. Then thanks to Flippity Steve, another link will magically appear in cell 5A. That’s the link you’ll give to your Little Darlings to play with.
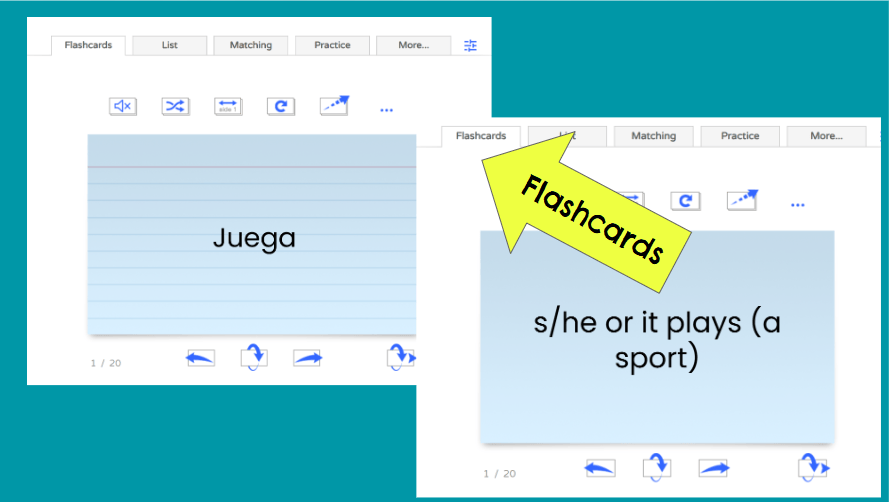
When your Little Darlings click on the link, they’ll have a lot of different ways to interact with the set you just made. First they’ll see the options for regular flashcards. They can click through them, shuffle them, remove cards, and flip between side 1 and side 2, just like real, paper flashcards.
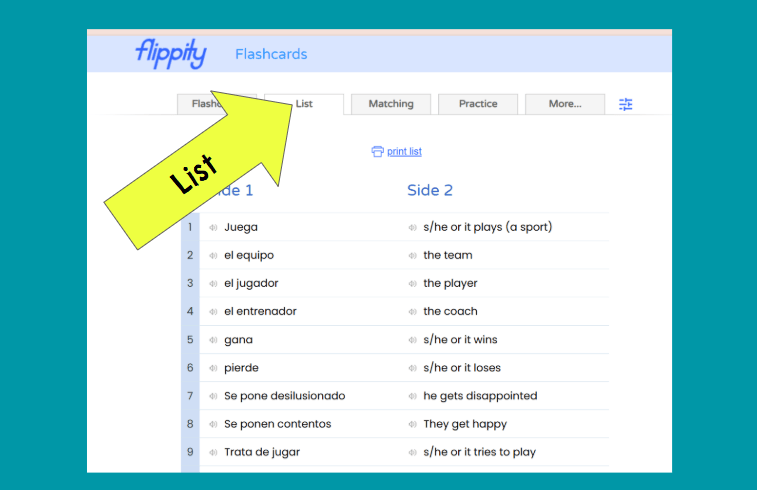
Across the top of the cards are other options. “List” will show them both sides of all the cards. Here’s where you (or they) can print out a vocab list, if that’s what you’re looking for:
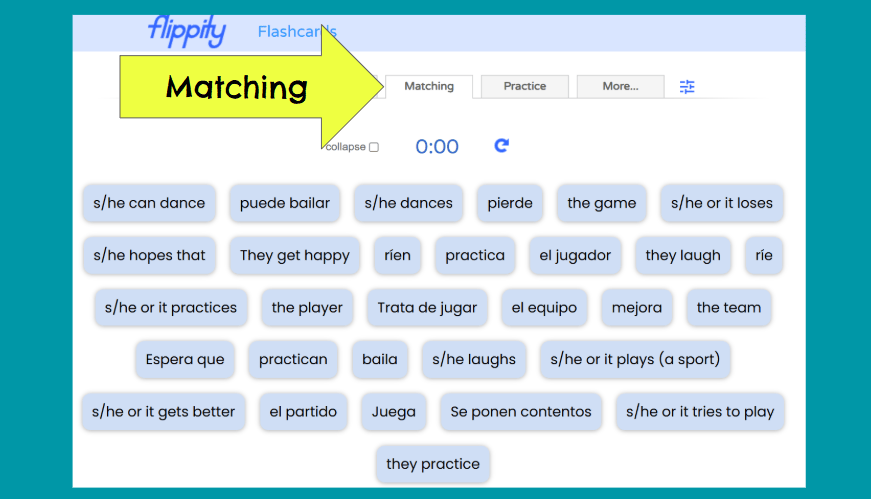
“Matching” shows them both sides of all the cards, and when they pair up Side 1 and Side 2, both cards disappear until there are no cards left. Here’s why it’s best to make all the cards the same color: if you have one pink card, one yellow card and the rest blue cards, the matching of the pink sides won’t require them to use their brains at all. If your cards are all the same color, they will have to actually read them and think to match them up, rather than matching the colors. Once they get good at pairing up the tiles, it’s fun to have them “race” a partner with the stopwatch feature.
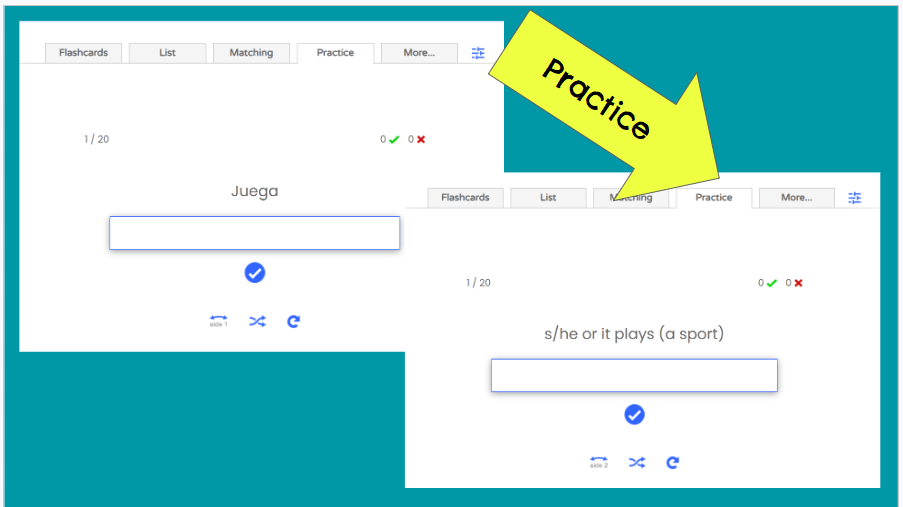
“Practice” allows them to type in the answers, either from Side 1 or Side 2 and gives them instant feedback.
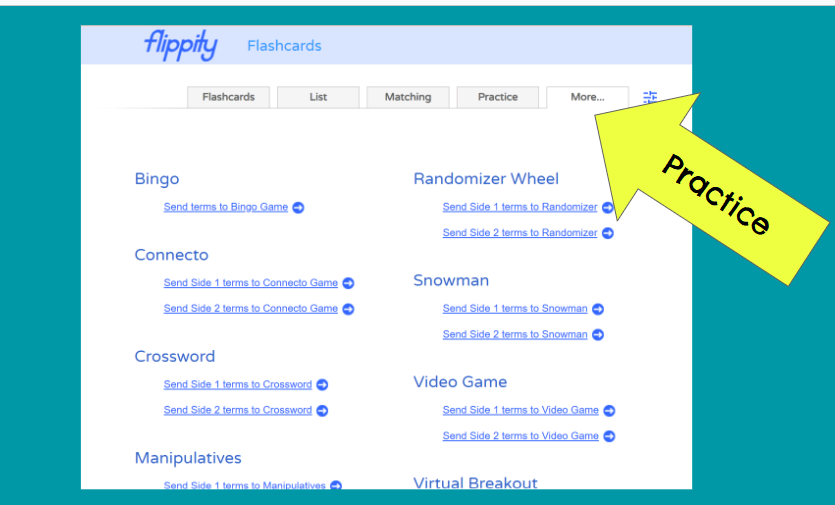
But THE BEST PART….wait for it….that very last tab, “More”. When you click on it, you can change your humble flashcard set into ANY OTHER FLIPPITY WITH JUST A CLICK!!! This is absolutely mind blowing and I haven’t played with it enough to know exactly how to use this, but you guys- THERE ARE SO MANY POSSIBILITIES!!! They could play Connect 4 (Connecto) or do a wordsearch or crossword. They could assemble a tile puzzle, play a Jeopardy style game or an arcade style video game. So many ways for them to interact with the set you made AND IT TAKES YOU EXACTLY ZERO MORE WORK! 🤔🤗😲 HOW DOES FLIPPITY STEVE DO IT?!?!
Now, you may be thinking, hmmm this doesn’t feel like a very CI-ish post. You’re right, flashcards with translations doesn’t exactly count as abundant and compelling input, necessary for language acquisition. BUT, I wanted to introduce the tool first before I show you a new game using Flippity Flashcards. Stay tuned, game post coming soon.
If you’re new to to Flippity, do check out my FLIPPITY FAVS with tutorials and examples:
Flippity Steve assured me that he’ll set up a Buy me a coffee link, so we can thank him for his hard word, but in the meantime, we can just be thankful for Flippity!

